Pages

Friday, December 14, 2012

Seeded Whole Grain Crackers


Last year I made crackers and I vowed to never, ever make them again...

After spending a couple hours in the kitchen making and rolling dough only to be left with crackers that were either burned or chewy, I became a firm believer that some things are just more convenient to buy. 

Whenever possible I try to make most of my food from scratch.  It's usually cheaper, healthier and fresher than what you would purchase at the supermarket and I enjoy the satisfaction of turning ordinary ingredients into something nourishing and delicious.

Some shredded cabbage and salt will yield a nutrient dense crock of saurkraut. Some oats, nuts, seeds, dried fruit and sweetner will give you a hearty bowl of granola to enjoy every morning.  Flour, yeast and some salt will give you a loaf of delicious bread. Throw some dried beans, vegetables and spices into a pot and you've got a steaming bowl of soup.  Once you get the hang of making most of your food from whole, unprocessed ingredients, it becomes second nature. 

I've replaced almost all pre-packaged food with healthier counterparts with the exception of a few items, crackers being one of them.  From time to time I make these delicious, raw buckwheat flax crackers, but since they require time for soaking and dehydrating they take a couple days from start to finish.  After finishing my last box of crack- a- lackas, I decided to give cracker making another go.  This time around I would find a different recipe from a reputable source and have a glass of wine while I made them so if they didn't turn out perfect I would be less likely to fling the entire batch across the kitchen in a bout of frustration.

Months ago I ran across a recipe for whole grain gluten free crackers from one of my favorite blogs, My New Roots.  I added the recipe to my favorites, but since I was still in the "homemade crackers are too much damn work" mode I didn't have any intentions in making them anytime soon. 
I happened to have some leftover cooked quinoa and brown rice in my fridge and was looking through my saved recipes for some inspiration. I pulled up the cracker recipe and was pleased to find that it called for quinoa and brown rice AND i had everything else on hand, so I figured I would give it a try one more time.

I'm not gonna lie... these were still a time consuming project, but the end result made it so worth it.  The "dough' came together in no time, throw everything in a food processor and you're done.  Attempting to roll out the dough evenly was the most difficult part.  Roll the dough too thin and you're left with burned crackers, but when it's too thick the crackers take forever to cook.  Don't be discouraged if you face this problem.  Just keep your eye on them.  If you notice some of them start to crisp up (usually the ones along the edges), simply break them off and remove from the oven.  The rest of the crackers will eventually crisp up it just might take alot more time than the recipe calls for. The original recipe said they should take 25-35 minutes, but mine took anywhere from 35 minutes to an hour.  In the end your patience is rewarded when you are left with delicious, unprocessed crackers that put anything you would buy in a box to shame.

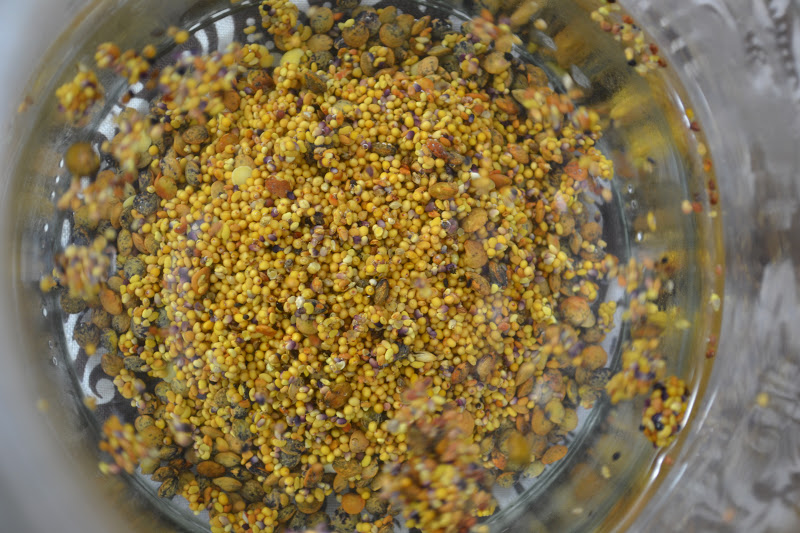
The bulk of these crackers is cooked brown rice and quinoa.  Soaked flax seed helps bind the mixture together and toasted sesame seeds are thrown in for crunch.  After creating a base dough, you can pretty much add in whatever you like.  I chose a mixture of poppyseeds, pumpkinseeds and sunflower seeds because that's what I had on hand.  I added some fresh chopped thyme and rosemary to one batch and they came out awesome!  Although I really loved this combination, I could see myself making these again with a couple variations, like adding some finely chopped black olives or garlic or topping the crackers with some fleur de sel, or adding some caraway seeds. 


Seeded Whole Grain Crackers (aka Happy Crackers)
From My New Roots

2 cups cooked brown rice
2 cups cooked quinoa
2/3 cup unhulled sesame seeds
½ cup flax seeds

2 Tbsp. tamari
1 tsp. sea salt
3 Tbsp. olive oil


1/2 c. Add in's:
Choose any variation of the following:
Nuts/Seeds: sunflower, pumpkin seed, almonds, walnuts, chia seeds, poppyseeds, etc..
Spices/Herbs: thyme, rosemary, garlic, oregano, smoked salt, black pepper, chipotle, etc..

Place flax seeds in a bowl and cover with 1/2 c. water. Let soak for at least 20 minutes. 
In a dry skillet over medium heat, toast seseame seeds until fragrant. Remove from heat and set aside.
Blend the cooled rice, quinoa, soaked flax, salt, tamari and olive oil in a food processor until a dough is created- it should form a ball in the food processor (add water if too dry, one tablespoon at a time). Then add the toasted sesame seeds and pulse to incorporate. The dough will be very sticky.
Preheat the oven to 350 degrees. 
Take out the desired amount of dough you want to work with and place it on top of parchment paper.  Add the desired nuts/herbs/spices  (I used poppyseeds, pumpkin seeds, sunflower seedsand fresh chopped thyme) and knead to incorporate.  Season to taste.  Place another piece of parchment on top and use a rolling pin to flatten into a very thin even slab.  Remove the top layer of parchment and using a knife or pizza cutter, score the top of the dough into desired shapes. Slide the parchment on to a cookie sheet and place in the oven.  Bake 25-35 minutes until crispy and golden (cooking time will depend on thickness of dough)
When the crackers are done, remove from oven and let cool five minutes.  Break crackers along score lines, let cool completely and store in an airtight container.  If the crackers have baked unevenly (some are crispy and others are not) place the uncooked ones back on the baking sheet and in the oven until completely dry.  
Crackers keep one week stored in an airtight container.


Wednesday, December 5, 2012

Herbal Profile: Lemon Balm


Lemon Balm (Melissa Officinalis)

Lemon Balm is a perennial herb in the mint family native to southern Europe and the Mediterranean. In North America, the herb has escaped cultivation and has spread into the wild... literally, this stuff spreads like wildfire! 

All of the parts of the plant can be used (flowers, stems and leaves) for medicinal purposes. It's role in medicinal treatments dates as far back as the time of the Roman Renaissance man, Pliny the Elder (A.D. 27-39).  The plant has a very pleasant scent and can be made into a tea, salve (topical ointment) or used in aromatherapy.

Due to the polyphenol tannins in lemon balm, it is regarded as an effective anti-viral treatment, especially the herpes simplex virus. The high selenium content in the herb assists with it's ability to regulate thyroid function and helps raise antioxidant levels, promoting immune system health.

Lemon balm is a calming herb for those who suffer from stress and anxiety. It is believed that the essential oil in lemon acts upon the part of the brain that controls the autonomic nervous system and can protect the brain from excess external stimuli. In addition to reducing stress it has been proven to improve mood, including mental preformance and memory.

The herb can also be beneficial for the gastrointestinal system. It can help to relieve flatulence, bloating, nausea, vomiting and cramps due to colitis. Sipping on a cup after dinner can alleviate the uncomfortable feeling you get after eating a large meal. Lemon balm also contains a pain reliever called eugenol.  Consumption of the herb may help to relieve headaches and muscle spasms including menstrual cramps.

Lemon balm is one of the few herbs that I will make into a tea for the taste alone (most others are used strictly for their medicinal value).  It has a very mild lemon flavor with a hint of mint.  I haven't had much sucess with it relieving menstrual cramps, but it definately helps calm me down when I'm feeling a bit stressed!
For a soothing cup of tea, bring one cup of water to a boil.  Pour water over 1-2 tsp. lemonbalm (in a teabag or tea ball).  Cover and let sit 10-15 minutes. Sip and feel the stress melt away...


Monday, December 3, 2012

gRAWnola


There have been periods in my life where cereal was my go to breakfast and nothing could break me out of my rut.  At any given time I would have five boxes of the stuff in my cupboard.  There would always be something sugary like peanut butter panda puffs and something uber healthy, like sprouted seven grains for those mornings after I drank several beers and somehow managed to eat an entire pizza and felt the need for some redemption.  Raisin bran, cornflakes, shredded wheat.. I loved it all!

For anyone that eats cereal, you know that the stuff is EXPENSIVE! These days, I just can't fathom paying six dollars for a box of that will be gone in no time, because we all know that serving sizes for cereal are straight up whack.  Who eats 3/4 c. of crispy rice cereal?  I mean, really...

I thought that buying granola in bulk would be cheaper than cereal because it's alot more filling and I would eat less, but that stuff is even more pricey, especially when it contains high quality organic ingredients. I stopped buying cereal and granola and decided to eat other things like muffins, quickbreads and oatmeal.  I was doing great for awhile and then my cravings for the stuff came back.  I refused to buy boxed cereal and decided to be all DIY and start making my own granola. 

Most homemade stuff is way cheaper and more delicious (and nutritious) than anything you would buy at the store.  I experimented with lots of different granola recipes and got hooked on this one made with olive oil.  I ate in for weeks straight and then fell into a rut.  I needed something different. 

Years ago I worked in a raw food restaurant that had the BEST granola.  It was filling, super healthy and tasted amazing.  Luckily I had the recipe stowed away and decided to try making it at home now that I had a fancy shmancy food dehydrator.  Grated apples make up a bulk of this granola instead of oats.  Raw almonds, sunflower seeds and buckwheat groats are soaked and mixed together with the apples, along with some date paste and agave nectar.  The end result was a crunchy not too sweet granola that was relatively inexpensive and oh soooo good for you. 


gRAWnola (makes 8 c.)
Barely adapted from I Am Grateful

1 1/2 cups soaked almonds
1/2 cup soaked sunflower seeds
1/2 cup soaked whole buckwheat
5 cups grated apple
1/2 cup pureed dates (about 7 large dates)
1/2 cup raisins (or other dried fruit)
1/2 cup dried coconut
1/2 cup agave nectar
1 teaspoon vanilla
2 teaspoons cinnamon
1/3 teaspoon salt

Rinse and drain the seeds. Place in food processor and quickly chop to reduce size of seeds only. Place mixture into large bowl. Grate apples, add to nut mixture. Puree dates in food process with the "S" blade attachment, if the dates are a little dry, add a little apple while pureeing. Add all the ingredients to the nut mixture and stir.

Prepare three dehydrator trays with Teflex sheets. Spread the mixture out on each sheet in a single layer. Dehydrate at 145 for 1 hour and then reduce temperature to 115. When your granola is dry enough to peel off the Teflex sheets, do so and place onto the grid sheets. Continue to dehydrate until dry (48-60 hours total).


Monday, November 19, 2012

Masala Chai Tea


Why not just call it chai?  Why masala chai?

By itself, the word chai is merely the generic word for tea in many African, Middle Eastern and Asian languages. For those of us that speak English, the term chai is synomous with what we would consider masala chai, a spiced milk tea distinct from other types of tea.

Up until about a year ago I had never experienced the deliciousness that is an authentic cup of masala chai. It wasn't something that I had very often, but I would occasionally order a chai latte at a coffee shop and think it was the best thing ever. Sugary, milky and spicy with enough caffeine to put a little pep in my step but not make me feel like I just did a line of cocaine.  Perfection.

Over the years I have gravitated towards a eating a more unrefined whole foods diet and have become obsessed  more inclined to make most of my meals and snacks from scratch.  I had googled the ingredients for the chai concentrate that I saw my barista using last time I got my latte on and was shocked to see sugar as the first ingredient on the list (actually I wasn't.. THAT'S why it tasted so freaking good), followed by honey, "spices", black tea and the ubiquitous "natural flavors".  Now I was on a mission. I HAD to figure out what spices were used so I could make it at home.  I could taste a hint of cinnamon and cardamom, maybe some ginger, but beyond that I couldn't identify what was in it.. probably because it's pretty damn hard to pinpoint what natural flavors taste like.

I searched the internet for a recipe only to learn that there is no fixed preparation when it comes to masala chai and most families have their own versions of the tea. Based on the fact that there are so many possible preparations, masala chai can be considered a class of tea rather that a specific kind. 

But alas, after a good amount of research... here's what I found.

When making masala chai, typically a strong black tea, such as Assam is used so that the spices and sweeteners don't become overpowering. Different teas are used in different regions; most chai in India is made with black tea whereas Kashmiri Chai is brewed with gunpowder tea.
Some people choose to take their chai unsweetened, but most people agree (myself included) that a good amount of sugar is needed to bring out the intricate flavor of the spices.  Plain white sugar, honey, jaggery, palm or coconut sugar can be used.
I once made the mistake of ordering chai without milk because I'm a bonafide milkaphobe (real word). Bad idea.  It tasted like tannic spices, although some people actually prefer it this way.  Usually whole or sweetened condensed milk is used, but I've made it with almond or soy milk with great results.

The traditional masala chai is brewed with different proportions of so called "warming spices". The spice mixture called karha, uses a base of ground ginger and cardamom pods. Other spices are added to this base depending on the region.  Most masala chai found on the streets, in homes or restaurants adds cinnamon, star anise and/or fennel seeds, peppercorns and cloves. Traditionally cardamom is the dominant spice, supplemented by other spices such as cloves, ginger and black pepper.  The traditional composition of spices varies by climate and region in Southern and Southwestern Asia.  For example, in Western India, fennel and black pepper are avoided.  The Kashmiri version used green tea rather than black and has a more subtle blend of flavorings; almonds, cardamom, cinnamon, cloves and sometimes saffron. Other possible spices may include nutmeg, coriander, cumin seed or licorice root.

Now that you know more than you probably wanted to know about chai... here's a recipe for ya'll.

Masala Chai Tea (makes 1 8 oz. serving, can easily be doubled)
From The Kitchn

3/4 cup water
2-4 whole green cardamom pods, smashed
1-2 thin slices fresh ginger
1 1-inch cinnamon stick
1 piece star anise
3/4 cup milk (I used almond)
1 1/2 teaspoons loose black tea leaves
Sweetener, to taste (I prefer honey)


In a small saucepan, combine the water, cardamom, ginger, cinnamon stick and star anise. Bring the mixture to a boil then lower the heat and simmer for a few minutes until the mixture is fragrant. Add the milk and tea leaves, and simmer for another minute then turn off the heat and let steep for 2 minutes. Pour into a cup through a fine mesh sieve. Discard the leaves and spices. Add sweetener, to taste.
If you want deeply flavorful tea in the morning, follow these alternate directions starting the night before.
In a small saucepan, combine the water, cardamom, cinnamon stick and star anise. Do not add the ginger yet. Bring to a boil then turn it off and cover the pan. In the morning, add the sliced ginger and bring to a boil then lower the heat and simmer for a few minutes until the mixture is fragrant. Add the milk and tea leaves, and simmer for another minute then turn off the heat and let steep for 2 minutes. Pour into a cup through a fine mesh sieve. Discard the tea and spices. Add sweetener, to taste.

Monday, November 12, 2012

Chickpea Noodle Soup


After being a vegetarian for fiftteen years, I started eating meat again.  Over the years I avoided meat for several reasons.  I orginally gave it up to lose weight.  As a teenager I thought I was fat (much like every crazy girl going through puberty) and believed that cutting out animal flesh would make me look like a model, only to discover that starving yourself and working out three hours a day does that. I kept this up for several years, eventually going vegan and became active in animal rights organizations like PETA. Yeah, I was THAT girl that got dragged away by police officers for barricading the enterance to Macy's chanting "fur is murder".  Ahhhh, those were the days.  I felt very strongly about animal rights and still continue to do so even though I started eating meat.  Yeah, I realize that I'm totally contradicting myself here.  How can you support animal rights and still have a clear conscience about eating meat?

First of all, I'm EXTREMELY picky when it comes to what I eat. Unless I know where it came from, (as in, I can drive to the farm where it was born, raised and salughtered) I won't eat it.  That narrows it down when it comes to eating out or dining elsewhere.  If I'm going to eat meat I want to be sure that the animal was able to roam free and was fed a healthy diet before it's life was taken. You would be be surprised how most animals are raised before their death.  It sickens me and I won't go into to detail, but it's not a pretty picture.

Luckily I have a local co-op that sells local meat, dairy, eggs and sustainable seafood, but it ain't cheap.  I'm willing to pay $6 for a dozen of eggs, but that lasts me at least a week, if not longer.  A whole chicken will run you $25 but will make several meals, including stock.  A pound of bacon might set me back $15, but again I can easily six meals out of this. If you are accustomed to shopping at a typical grocery store you probably think these prices are outrageous (I should note that I get a hefty discount when I shop for being a co-op member).  I agree, it's not cheap, but I also think that you get what you pay for and when it comes to most things in life, it's quality not quantity.  I don't eat meat everyday (I actually only eat it once a week, if that) and enjoy it as more of a side dish than a main. 

We live in a consumer culture where we want more bang for our buck and our food system reflects that.  People can get massive quantites of meat for very little money at most grocery stores.  The more they have, the more they eat, and the more unhealthy they become.  It been proven that countries that eat less meat have less health problems, and just look how healthy we Americans are!

So, here's the lesson: Meat is not unhealthy, nor will it make you fat., just don't go all cray-cray with it. Personally I feel a little healthier when I add a little high quality animal flesh to my diet.  Since local, sustainable meat IS expensive it doesn't always make it to the dinner table, and I'm ok with that.

I had been craving chicken noodle soup for months, but spending $25 on a chicken wasn't in the budget this week. Then, I did what any hippy vegetarian cook would do, and broke out a can of chickpeas.... BOOM.. Chickpea Noodle Soup!


Chickpea Noodle Soup (serves 2)

4 c. vegetable broth
3 T. mellow white miso
1/4 lb. angel hair pasta (spaghetti or linguine work well too)
2 medium carrots, peeled and cut on a 1/4" diagonal
3/4 c. chickpeas
1/4 t. poultry seasoning
1 large clove garlic, grated
2 c. kale, stems removed cut into thin ribbons
2 scallion, sliced
Fresh cracked pepper, to taste
Extra virgin olive oil

Cook the angel hair or other noodles of choice until al dente. Drain and set aside.
Place the vegetable broth in a saucepan and bring to a boil. Place the miso in a small bowl and ladel 1/2 c. broth into the bowl.  Whisk until thoroughly mixed.  Add the carrots, chickpeas and poultry seasoning to the remaining stock and reduce the heat to a simmer.  Cook until the carrots are fork tender, about five minutes.  Add the miso/stock mixture back to the pot (be sure not to boil the miso as it will kill the live beneficial bacteria) along with the grated garlic.  Add the kale and cook on low for an additional 2-3 minutes.  Divide the noodles between two bowls and pour the broth mixture over top.  Top with sliced scallions, lots of fresh cracked pepper and a drizzle of olive oil. 

Saturday, November 10, 2012

Hemp Seed Milk


As much as I love all things dairy (cheese, ice cream, gelato, and yogurt), the idea of straight up cows milk kind of skeeves me out (yeah, I know... add it to the list of my weird food phobias).  For some reason it just tastes too much like cow teet or something.  I don't know....

Most people that give up dairy products for health reasons turn to soy milk as an alternative, but there are so many other options out there. Rice milk, oat milk, almond milk, hemp seed milk and even flax seed milk.  Health food stores and food co-op usually have a section for these alternative milks, packaged in shelf stable cartons.  You can choose from sweetened, unsweetened, vanilla or chocolate, full fat, low-fat or fat-free.  Many of them are even fortified with calcium, vitamin D and other essential vitamins.  Having these options at our disposal is great for convenience sake, but when it comes down to it, these alternative milks are highly processed, not to mention expensive. 

Most people don't realize that you can make your own nut/seed or grain milk from home. Not only is it way cheaper, it's alot healthier than anything you would buy in the store.  Most store bought alternative milks contain natural and artificial flavors (whatever those may be) and can be high in sugar.  Many of them claim to be high in vitamin B12, omega 3 fatty acids or calcium, but most of these are added back in because many of those nutrients were destroyed during processing.  When you make milk at home you are left with two ingredients: water and whatever nut/seed/grain you used. All of the vitamins and minerals are left intact and you are left with a delicious, healthy beverage. 

Two of my absolute favorite milks to make at home are almond and hemp seed milk.  Almond milk is probably my favorite but that requires soaking your nuts for at least eight hours and sometimes I'm not that good at planning ahead.  Hemp seed milk can be made in minutes.  Throw some hemp seeds in a blender, add some water and blend.  You can even add some sweetneer like honey or agave or vanilla extract if you like. 

Not only do hemp seeds make a great milk substitute but they are loaded with all essential amino acids, iron, folic acid, potassium, calcium, zinc, and are also rich in easily digestible plant based proteins. They are the only food that contain gamma-linolenic acid (GLA), an essential fatty acid. In fact, its essential fatty acid ratio is absolutely perfect for our bodies.  Hemp has gotten a bad reputation due to the fact that some people think that it contains THC, the active chemical in marijuana that will get you high. Chill out.  There is none of that going on here.... just creamy deliciousness.


Hemp Seed Milk (makes 1 quart)

1/2 c. hemp seeds
4 c. water
raw honey or agave (opt)

Place hemp seeds and water in a blender. Blend on low for one minute then crank it up to high and blend for an additional 30 seconds. If you want it on the sweet side, add a bit of agave or raw honey and blend for another 10 seconds, or so. Pour into a glass jar or bottle and store in the fridge for 3-4 days. Shake well before using.


Thursday, November 8, 2012

Herbal Profile: Valerian


As much as I love cooking, photographing and recipe development, sometimes I just don't have the energy. Especially after working a full day in a kitchen, or in my current situation, being laid up in bed healing from a lingering concussion.  Sometimes I will develop a recipe only to find out the end result looks like cat vomit. Or... I will throw a bunch of random ingredients together and think the dish looks beautiful and blog worthy but the last thing I want to do is break out my camera when I'm already borderline passing out from low blood sugar. Real life.

My food as of lately has been pretty boring since I haven't been able to be in the kitchen for more than 15 minutes without feeling like I'm going to hit the floor. Cooking is my creative outlet and without it I feel a bit.. well, empty.  It sounds strange, but food is my passion, my life force, if you will.  I cook professionally and when I'm not at work I'm either blogging about food, eating food or looking for new recipes.  I'm at a point where I want to cook and be in the kitchen. My mind says yes (er, sort of), but my body is telling me to rest.

So, out of this temporary hiatus in the kitchen, a new idea was born.  Why not write about something else that I am passionate about: Herbal Medicine. You see.. I'm really not a fan of western medicine.  I think it can be extremely helpful in certain situations but I think that we have become a culture that relies on pills to fix all of our health problems. Whether it be high cholesterol, high blood pressure, diabetes, gastrointestinal ailments, anxiety, depression, etc. there is surely a pill out there to "cure" what ails you.  Don't get me wrong many people benefit greatly by taking these medications, hell, it may be keeping some of you alive!  However, most of these pills come with unwanted side effects, and in the long term, who knows what it's actually doing to our insides.  I currently rely on prescription medicine and have done so in the past, but I think that there are other alternatives out there that have been proven to be just as effective and are alot easier on your body.  Changing your diet to include whole, unprocessed foods is a no brainer but alot of people are resistent to make such a huge lifestyle change.  A healthy diet is the foundation for good health along with exercise and stress management techniques.  But, lets be real.. we all get sick, even if we are doing everything "right".  The first thing we usually reach for is a pill that will make us feel better.  Heartburn, pop a pill.  Cold coming on? Pop a pill.  Can't sleep? They have a pill for that, too. These pills may help in the short term, but they are really just covering up the symptoms not getting to the root of the problem.

That's where herbal medicine comes in.  Why not try something that comes from nature (sometimes you can even find it in your garden or back yard), actually helps treats the problem and not just cover it up, and in most cases doesn't cause any nasty side effects. You don't even need health insurance or a prescription from a doctor. Herbs have been used for thousands of years and have been proven effective in the case of many ailments.  When taken, some herbs work immediately whereas others have to be taken in frequent high doses or taken over an extended period of time to see any noticeable benefit. 

So, this here post is the first in the herbal profile series.  I hope to post about a new herb once a week.  In these posts you will learn the history of the herb, what it's used for, how to prepare it (tea, tincture or decoction) and what it tastes like. Some say that the more bitter or vile an herb tastes the better, which is not always the case, but I usually find it to ring true.

**** Disclaimer: I am a cook and not certified herbalist. Everything you read here is based on what I have read or personally experienced. Do your research before taking any herbs as they can interfere with certain prescription medications (i.e. St. Johns Wort can interfere with birth control pills-YIKES!). Some herbs can actually worsen a particular health condition (i.e. Licorice can raise your blood pressure)

I am able to find most of the dried herbs and/or tinctures at my local health food store.  If you are interested in buying online I highly reccomend checking out Mountain Rose Herbs or Herb Pharm.


Herbs to Know: Valerian Root (Valeriana officinalis)

Valerian's name is derived from the Latin word valere, "to be well", "be strong" and has been used as an herb since at least the time of ancient Greece and Rome. Today ther herb continues to be one of the most popular medicinal herbs in the world.  Valerian is best known for it's effects on the nervous system. It is one of the best known herbs for insomnia/restless sleep/stress and anxiety. Valerian has powerful tonic effects on the heart and when combined with hawthorne berries it helps to aleviate altitude sickness.  It is also known for it's anti-spasmodic properties, helping to relieve spastic coughing.  Because of it's muscle relaxant properties, it's an excellent remedy for menstrual tension and stress. When combined with cramp bark it effectively relieves menstrual cramps.

Valerian's odor is a little, how shall I say.... ripe.  I'm not gonna lie, it smells a little bit like dirty socks.  The odor is actually an indicator of the strength of the root: the riper, the better!  It can be prepared as a tea or taken as a liquid extract (aka tincture). I prefer liquid extracts in most cases because they are easily absorbed, digested and assimilated by the body. Sometimes taking 30 drops in some water is easier than drinking 1-2 cups of the tea, especially when the taste isn't very pleasant.

Valerian is dose-dependent; in other words, in order to be effective, a large amount may be required.  Don't be afraid to take adequate amounts. Begin with a slow dose and work your way up until you feel the relaxing effects.  The herb is non-habit forming and will not make you feel groggy.  You can tell when you've taken too much when your muscles feel rubbery, or you experience a heavy, weighed down feeling. 

I've taken valerian tincture as a sleep aid and have combined it with cramp bark, ginger and pennyroyal to help alleviate menstrual cramps.  Unlike some herbs that you must take for an extended period of time to experience the benefits, valerian starts working immediately.  Next time you reach for an over the counter pain reliever for cramps or a prescription sleep aid to help you get some rest, give valerian a try instead.

Tuesday, October 30, 2012

Kimchi Fried Rice (Kimchi Bokkuembap)


Last week I suffered a pretty bad blow to the head.  I didn't loose consciousness or anything, I just felt like someone dropped a brick on my noggen.  After a night in the ER I was told that I had a minor concussion and symptoms should dissapear within a week.  Being the obsessive compulsive, Type-A personality kinda gal, I returned to my job, shortening my hours. I mean, anything less that 40 hours is considered rest, right?  I would come home, lay down for a bit, run an errand if I was feeling up to it and then spend an hour in the kitchen cooking dinner. 

A week had gone by and I wasn't feeling any better. I was actually feeling worse.  Headaches, vertigo, and dizziness were preventing me from doing anything (working, going to the store, walking the dogs, etc..) To sum it up, I felt (and continue to feel) drunk and severly hungover at the same time, which is not exactly a fun time.

Rest.  Like, really resting is very difficult for me.  Laying out the couch doing absolutely nothing is pure torture.  So much, that even when I felt like absolute shit I would still continue to go about my day as if nothing was wrong, and would wonder why it always took so long for my body to heal itself.

I tried to work through my head injury and that got me nowhere fast.

My brain was sending my body a very important message (you know that I need to chill the hell out NOW, or I could do some serious damage), and for once, I finally listened. Sleeping 8-10 hours a day and confining myself to the couch, moving only to eat and pee has become the new protocol.  Anything stimulating (reading, listening to music, watching T.V., playing on the computer) is a big no-no when trying to heal from a concussion, but I'm still allowing myself a couple hours a day so I don't go cray- cray.

Baby steps.

So what, you ask, does kim chee fried rice have to do with having a concussion?

Absoultely nothing, other than the fact that all of my meals have to be prepared in less that ten minutes so I can get my butt back on the couch, and this here fried rice fits the bill perfectly.  It fills me up all day, is super healthy (er, other than the fried part), and is the ultimate comfort food when I'm feeling down.

As long as you have some leftover rice, kimchi, eggs and some vegetables on hand, you can throw this dish together in no time.

Up until recently I had never had kimchi.  I love fermented foods (saurkraut, kombucha, yogurt) for their taste and health promoting benefits but never gave this one a chance.  However, once that first bite crossed my lips, I became addicted and have gone through an entire jar in less than three days!

Kimchi is a traditional fermented Korean dish usually made with cabbage, radish, onions, garlic, chilis, and seasonings, but can vary from region to region.  It's salty, crunchy, sour, spicy and oh so good for you due to the fermentation process. Kimchi is consumed as you would any pickled vegetable, most commonly enjoyed with rice, noodles, meat or tofu and vegetables.  Whipping up a batch of kimchi fried rice (aka kimchi bokkuembap.. I just love saying that) is a great way to incorporate this delicious pickle into your diet when you want a quick meal.


Kimchi Fried Rice (Kimchi Bokkuembap) (serves 2)

3 c. leftover rice (I used white jasmine)
2 T. sunflower oil (or any neutral oil)
3 cloves garlic, grated
2" piece ginger, peeled and grated
two large handfuls baby bok choy, rough chopped
two large handfuls baby spinach
3/4 c. kimchee, rough chopped (I used Mama O's brand straight outta Brooklyn)
4 scallions, thinly sliced.
2 t. sesame oil
cayenne or crushed red pepper flakes, to taste
sea salt and black pepper, to taste

2 eggs
1 T. butter or sunflower oil

Heat 2 T. oil in your largest cast iron skillet (or any other large frying pan) over medium high heat. Add the baby bok choy and cook until wilted.  Add the garlic and ginger and cook an additional 30 seconds, stirring constantly to prevent burning.  Add the rice, tossing to coat with the oil. Spread rice into a single layer and let cook for a couple minutes.  Using a spatula, mix the rice up a bit then spread it out again.  Repeat until the rice starts to crisp up a bit, then stir in the baby spinach, half the scallions and kimchi.  Cook for an additional 30 seconds, stirring constantly to wilt the spinach. Add sesame oil and season with cayenne or crushed red pepper flakes (depending on how spicy your kimchi is), sea salt and black pepper. Divide the fried rice between two bowls. Reduce the heat to low, scrape out any remaining bits left in the skillet and return to the burner.  Add butter or oil, then crack two eggs into the pan. Cook until the whites are set but leave the yolks runny. Carefully slide the eggs onto the fried rice.  Top with the remaining scallions and eat immediately. 


Monday, October 29, 2012

Sprouting: A Do It Yourself Guide


Sprouts have long been considered wonder foods, being one of the freshest and most nutritious of all vegetables. Sprouts are very alkalizing, and are high in in vitamins A, B and C and rich in minerals such as iron, calcium, and potassium. They are also high in fiber and omega 3 fatty acids.

Most of you are probably familiar with alfalfa or clover sprouts (the kind you're most likely to see on salads or sandwiches) or mung bean sprouts (those crunchy white sprouts integral to Asian cuisine), but you can sprout almost any seed or bean.  Even wheat and spelt can be sprouted and used to make bread. 

Most people think that growing your own sprouts is a difficult task, but it couldn't be easier!  All you need is some seeds, a glass jar with a mesh screen, some water and about two minutes a day to rinse and drain your sprouts. A clamshell of sprouts will usually set you back $2-3, which considering how nutrient dense they are, isn't a bad price. However, purchasing your own seeds for sprouting is inexpensive and growing them from seed will ensure that you have the freshest sprouts possible!

Make sure you purchase high quality beans/seeds for sprouting.  Health food stores or on-line shops sell an abundance of seeds and beans, however, you may have difficulty sprouting regular 'ol beans and seeds from the grocery store because they are sometimes treated with enzyme inhibitors to prevent the sprouting process.  Avoid using seeds packaged for gardens because they may be treated with pesticides. 

I invested in a sprouting jar fitted with a perforated lid which makes the rinsing/draining process easy peasy, but you could also use a mason jar and purchase a mesh screen (either plastic or metal).

Fortunately, I was able to find all of the above supplies at my local co-op, but the sprout people, an online company, has everything you need to get started.

Before you begin:
Make sure your sprouting jar is clean and sanitized to prevent the growth of bacteria or molds.
A little goes a long way with those seeds!  Most expand 8 times their original volume, so using as little as 1 -2 tablespoons of seeds will yield several cups of sprouts.

Happy sprouting!


Sprouting seeds (lentil , clover, radish and alfalfa).

Soak 3-4 T. of seeds in a sprouting jar or a mason jar fitted with a mesh screen in enough cold filtered water to cover by 5 inches.  Let sit on the countertop for 24 hours.


After your sprouts have been soaking for a day, drain thoroughly.  Fill the jar half way with cold filtered water and swish your seeds around a bit.  Drain again and place the jar in a bowl positioned at a 45 degree angle.  Repeat the rinsing/ draining process two to three times a day (I usually do it twice: in the morning and before I go to bed) returning the jar to it's tilted position each time. The amount of time it will take for your seeds to fully sprout will vary from seed to seed and factors such as temperature an humidity.  This blend takes 5-6 days total (counting soak time)

24 hours after our initial draining.


                                   48 hours later.


                                     72 hours later.


And... we got sprouts!  On the final day I like to place my jar on a windowsill, exposing it to sunlight for a couple hours.  This allows the sprouts to develop chlorophyll, turning them from yellow to light green.

Once your sprouts are done, transfer them to a tight fitting container lined with paper towels to absorb any excess moisture.

Friday, October 26, 2012

Raw Tacos


You're probably thinking.. enough with the raw food already. 

Where are all of the recipes featuring brussels sprouts and acorn squash and cranberries.  Where are the warming comfort foods?

Patience, little grasshoppers.  We've got five good, solid months of cold weather ahead of us, so I'm in no rush to be eating squash (and blogging about it) every other day of the week.  Check back in a month or so when I'll be bitching about the cold and living off of hot toddy's.

There are some recipes featured on my blog that in no way resemble the "real thing".  I'm not trying to fool anyone by convincing you that this here raw taco will taste just like something that you would pick up at your nearest Mexican restaurant.  There is no fried corn tortilla, no ground beef and no sour cream.  The only thing that you might find in both of these versions is some fresh salsa and guacamole.

But, then again.. why should we have to compare something that is delicious and thoughtfully prepared to something else when we can just enjoy it for what it's worth.  Just like my raw carrot and parsnip fettucine or these raw brownies.  I'm not trying to pass them off for pasta made with wheat or brownies made with eggs, butter, sugar and flour, but they are still tasty nonetheless, and much healthier too!

Cabbage leaves are a great vehicle for anything that you would normally put into a taco shell or corn tortilla except they contain no fat or wheat but still give you some crunch.  Ground walnuts with some traditional taco meat spices (chipotle, cumin, chili powder and garlic) mimic the flavor and substance that you would get with ground beef.  Soaked raw cashews blended with a little lemon and salt makes a creamy alternative to sour cream and is great for those that have an intolerance to dairy.  Adding a dollop of guacamole and a little fresh salsa made with cherry tomatoes and bell peppers is a given because they are delicious and belong in a taco.

The ingredient list or instructions may seem a bit daunting, but everything comes together very quickly. If you're pressed for time you can always throw in a couple slices of avocado instead of making a batch of guacamole.  Just remember to soak your cashews ahead of time for the sour cream!

Raw Tacos
From My New Roots

Walnut Taco Filling:
1 c. raw walnuts
1 T. nama shoyu (raw, unpasteurized soy sauce) or tamari
1/8 t. ground chipotle
1 t. ground cumin
1 t. extra virgin olive oil

Place all ingredients in a food processor and pulse to mix

Cashew Sour Cream:
½ c. raw cashews
1 ½ T. lemon juice
1 t. apple cider vinegar
1/8 t. salt
Water, as needed for blending

Soak cashews in enough water to cover by 3 inches for at least 6 hours, or overnight.  Drain cashews, then place in a blender with the remaining ingredients.  Add 2-3 tablespoons of water and blend, scraping down the sides as needed.  Add water in 1 tablespoon increments until desired consistency is reached. For a thinner sauce, use more water, for a thicker sauce, use less.

Raw Salsa:
1 c. chopped cherry or grape tomatoes
½ red bell pepper, chopped
½ orange or yellow bell pepper, chopped fine
½ red onion, minced
¼ c. chopped cilantro
½ clove garlic, minced
Juice of ½ lime
1 t. raw honey
1 T. extra virgin olive oil
Pinch of sea salt

Whisk the garlic, lime juice, honey, olive oil, and sea salt in the bottom of a bowl and set aside. 
Cut up the vegetables into small pieces, chop the cilantro and add everything to the dressing bowl. Fold to combine and let sit for at least 10 minutes to allow the flavors to meld.


Cabbage (red or green)

To assemble your tacos, gently peel off the outer leaves of cabbage, then carefully remove several inner leaves.
Place a small amount of tacos nut meat in the bottom of your cabbage leaf.  Top with a generous amount of salsa, a spoonful of guacamole and a dollop of sour cream.  Fold up like a taco and eat!  Don't forget the napkins, even raw tacos are a messy affair!


Thursday, October 25, 2012

Olive Oil Granola


I work in one of those kitchens that always has some sort of scraps laying around for staff to munch on.. broken cookies, wonky shaped soft pretzles, day old rolls, or if we're lucky, a buttermilk biscuit or scone that somehow didn't make it's way to the bakery case.

Despite the fact that I could clearly have a free breakfast at my disposal every morning, I am one of the few that still choose to brown bag it.  Sure, muffins and cookies and scones are freaking delicious.. but I need me a REAL breakfast. Working in a kitchen is kinda like low impact aerobics.  There is alot of walking, squating, lifting and bending involved.  I used to be one of those people that would skip breakfast, munching on an occasional scrap of a chocolate chip cookie here and there, but my body needs some serious nourishment in the morning to allow me to stay energized and focused. 

The trick is finding the right amount of food that will fill me up, but not weigh me down. Optimally, I would start each day with a thick slice of toast, topped with some sauteed greens and a poached egg. Starting work at 6 a.m. doesn't really give me that opportunity, so I stick with things that are easy to eat standing up, that I can munch on while I work.

One of my favorite breakfasts on the go is granola and yogurt.. a classic combo.  Up until recently I would bring my own yogurt, and then choose from one of thirty available granolas available to me in the bulk aisle at work.  Can I just tell you... granola is EXPENSIVE! A mere serving (like, 1/3 c.) granola (the good kind made with maple syrup and lots of nuts and fancy dried frut like mulberries and goji berries) would set me back two dollars. TWO DOLLARS!  That's just poppycock. 

There are certain things that are much more cost effective to DIY (do it yourself) and granola happens to be at the top of thie list.  The great thing about making your own granola is that you can customize it to your liking. Most granola contains lots of sugar (usually disguised as evaporated cane juice) and some neutral fat like canola or sunflower oil, which isn't exactly health food, despite the fact that it has always been labeled as such.

I've made granola with coconut oil in the past with great results but decided to switch things up a bit using extra virgin olive oil.  I added cashews, almonds, pumpkin and sunflower seeds along with some shredded coconut and raisins, with a combination of maple syrup and local honey to sweeten things up a bit.  The end result was some relatively healthy, crunchy, not too sweet granola that costs a fraction of what you would pay at the store.

Do your body a favor. Get all hippy like and eat some homemade granola.

Olive Oil Granola (makes ALOT)

4 c. oats
1/4 c. raw pumpkin seeds
1/4 c. raw sunflower seeds
1/4 c. raw cashew pieces
1/2 c. raw almonds, rough chopped
3/4 c. unsweetened coconut
1/8 t. sea salt
1 t. cinnamon
1/4 c. extra virgin olive oil
1/2 c. maple syrup
1/4 c. honey
1 t. vanilla extract
1 c. raisins

Preheat oven to 325 degrees. Line two sheetpans with parchment paper. In a large bowl, combine the oats, nuts, seeds, coconut, sea salt and cinnamon.
In a medium saucepan over low heat, stir together the olive oil, maple syrup and honey. Stir until well combined. Remove from the heat and stir in the vanilla.
Pour the wet ingredients to the oat mixture and divide between the pans, making sure the mixture is evenly distributed in a single layer.
Bake for 45 minutes, stirring every 15 minutes. When the oats are lightly browned and toasted remove from the oven and set aside to cool.  Stir in raisins and store in an airtight container.


Tuesday, October 23, 2012

THE Raw Brownie


You know when you have a recipe for something, be it chocolate chip cookies or lasagna or apple pie and you are convinced more than anything in the world that yours is the best?

Don't lie, because I know you do.  I have several recipes that I make time and time again never even botherning to try something new because, well...mine is the best. How could this other recipe possibly compare to the awesomeness that I've been making over and over again with great results every time? I mean... why mess with a good thing?

I was sure that I had found the perfect raw brownie recipe. It was super easy to throw together and I usually had all of the ingredients necessary to whip them up last minute to satisfy my occasional chocolate fits.  When planning the dessert for my raw food cooking class I was convinced that these would be a hit and didn't even think twice about searching for another recipe. 

 My cooking class partner suggested we try her raw brownie recipe.  Like myself, she was pretty set that hers were the best. I don't know if it was the stress of planning everything else for class or the fact that I was trying to be less of a controlling asshole, but I decided to push my brownies to the backburner and go with her recipe instead.  I mean... I really SHOULD try new things anyway.

Everyone in our class loved the brownies, but I was on such an adrenaline rush that I really didn't have much of an appetite for dessert so I saved a couple to eat for breakfast the next day (because raw cacao is a totally acceptable breakfast option).

I think I cried a little bit after my first bite, they were THAT GOOD.

Sooooooo... I think it's safe to say that I have a NEW favorite brownie recipe!  Not that my other one wasn't amazing... but this one is like, HOLYCRAPBALLSAMAZING!

On the upside this recipe is just as easy as my old standby, but unfortunately they are a little more expensive to make.  Unlike regular brownies that I would have no problem eating half a pan in one sitting, these are pretty dense so I couldn't really imagine eating more that one... or two.

Make these brownies.  They'll be your new favorite and you can impress all of your friends when you tell them they are raw!

THE Raw Brownie

2 c. whole walnuts
2 ½ c. medjool dates, pitted
1 c. raw cacao powder
1 c. raw, unsalted almonds, roughly chopped
¼ t. sea salt

Place walnuts in a food processor and pulse until they resemble fine crumbs. Add the cacao and sea salt and pulse to combine.
Add the dates one at a time through the feed tube of the food processor while it is running. You should end up with a mix that appears like cake crumbs, but when pressed should easily stick together. (If the mixture doesn’t hold together well, add more dates)
Transfer mixture to a large bowl and combine with the chopped almonds.  Press into an 8” by 8” cake pan lined with parchment paper. Place in freezer or fridge until ready to serve (it is also easier to cut these when they are very cold). Store in an airtight container.


Monday, October 22, 2012

Carrot-Parsnip Fettucine with Cilantro Pumpkin Seed Pesto


My friend Renee (host of the blog, Nourish Your Roots) and I taught our very first cooking class this past weekend at the Troy Arts Center and IT WAS amazeballs! I had never attended a cooking class, let alone been given the opportunity to teach one, so the experience was a real treat. Luckily, we had a great group of women as our audience which made the class run smooth (the hard cider I chugged right before the class may have helped as well) with no awkward moments or uncomfotable pauses.  So, ladies if you're reading this, thanks for being so awesome!

There are so many directions you can take when teaching a cooking class, and at first we had no idea wheat we wanted to do, other than keeping it vegetarian.  Even narrowing it down to a class that would exclude the use of of meat, we felt we needed to do something that would grab peoples attention.  We both are fans of cooking with unprocessed, nutrient dense, whole foods and thought why not teach a class in raw foods preparation. Although I don't follow a raw foods diet, I try to incorporate as much raw food into my diet as possible have always loved the challenge of showing people that raw, unprocessed foods can taste just delicious as cooked food.  We weren't sure if we would draw a huge audience since upstate New York isn't exactly known for their raw food scene, but we said screw it and decided to roll with it and ended up with a sold out class!

We compiled most of our recipes from one of our favorite blogs, My New Roots. Sarah's style of cooking in very similar to Renee's and mine, and we knew that if it was posted on her blog we could count on it being delicious.

We decided to start out with a ginger-goji berry lemonade, followed by carrot parsnip fettucine with cilantro pumpkin seed pesto (pictured above). The main course was a raw taco fiesta (taco walnut meat served in cabbage leaves with cashew ricotta, avocado and a tomato-bell pepper salsa fresca). To end the meal we served fresh homemade almond milk and raw brownies (recipe coming soon!).

Yeah.. we're pretty amazing.


Hopefully I'll slowly be adding these recipes to my blog (since I didn't have one spare minute at my class to take any pics) but in the meantime you can check them out at My New Roots!

Fortunately, I snapped a shot of the carrot parnsip fettucine when we were doing a trial run for our class to ensure that everything were were planing on making was, in fact, edible.

I've made "raw" pasta in the pasta using a fun little gadget called a spiralizer, which basically takes vegetables (zucchini, celery root or daikon radish) and turns them into long noodles (similar in size and shape to spaghetti or fettucine), with which you can then top with a raw marinara, pesto or even dress with a little olive oil and lemon for a simple side. A spiralizer great to have on hand if you are doing mass quantities of noodles, but I have found that a regular old vegetable peeler will give you the same results.

Carrot-Parsnip Fettucine with Cilantro Pumpkin Seed Pesto

Carrots
Parsnips

Cilantro and Pumpkin Seed Pesto:
¼ c. raw pumpkin seeds
2 c. fresh cilantro leaves and tender sprigs
2 cloves garlic, peeled
1-2 T. lemon juice
1 t. seeded and coarsely chopped jalapeno pepper
½-3/4 t. salt
½ c. extra virgin olive oil

Place pumpkin seeds in a food processor and process until broken down a bit.  Add the cilantro, garlic, lemon, jalapeno and salt and process until finely ground. With the motor running, stream in the olive oil until the mixture is creamy and fairly smooth.

Using a vegetable peeler, peel the carrots and parsnips into long, thin strips, dropping into a bowl as completed.  Add a drizzle of olive oil, a splash of lemon juice and a pinch of salt and toss until vegetables are well coated.  Set aside for about 10 minutes, until softened.

Add the pesto to the parsnips and carrots and toss well to combine.


Monday, October 1, 2012

Zucchini Bread

There is a brief moment in time, usually the middle to end of September, where the last of the summer produce sits alongside the first harvest of winter squash, pumpkins and apples.  The days still creep up into the upper 70’s, but the mornings and evenings are cooling down, for sure.  A warming corn chowder starts to sound a little more appealing than corn on the cob.  A salad of fresh picked tomatoes, basil, and mozzarella doesn’t sound nearly as appetizing as some hearty bitter greens sautéed with garlic and white beans served with a nice hunk of garlic bread.           

As much as I’m craving kabocha squash, apple cider donuts and roasted Brussels sprouts, I’m trying to cram as much zucchini, eggplant, cucumbers and bell peppers in my mouth as possible.  In a couple more weeks, it’s gonna be squash season until April, so I’m enjoying what I can get until it’s gone.

Luckily, I have several friends that know what the hell they are doing in a garden (unlike myself)and always have an excess of basil, cherry tomatoes, summer squash and zucchini that they are more than willing to give away.

Unfortunately, once I am given all these free vegetables I sometimes have a difficult time using them up before they make their way into the compost bin.  Basil is a no brainer. Freeze it or make an ass ton of pesto and eat it all week long.  Cherry tomatoes can be roasted and thrown into a quick pasta with some of that fresh basil.  Zucchini is one of those vegetables that can be grilled, stuffed or grated and made into fritters. Really, though..my favorite way to eat the stuff is in the form of bread.

I’ve been on the quest to find a tasty, zucchini bread that has SOME redeeming nutritional benefits.  That way when I eat over a half a loaf in a day (breakfast, afternoon snack and as an after dinner treat) I feel no gulit or remorse whatsoever.

Whole wheat flour, walnuts, zucchini, eggs... healthy, right?

Whatever...It could be worse.


Zucchini Bread (makes 2 loaves)
Slightly adapted from 101 cookbooks

1 1/2 cups chopped walnuts, plus a few to sprinkle on top
1/3 cup poppy seeds
zest of two lemons
1/2 cup crystallized ginger, finely chopped

1/2 cup unsalted butter, slightly softened
1 cup sugar
1/2 cup dark brown sugar, lightly packed
3 large eggs
2 teaspoons vanilla extract

3 cups grated zucchini (about 3 medium), skins on, squeeze some of the moisture out and then fluff it up again before using
3 cups whole wheat pastry flour
1 1/2 teaspoons baking soda
1/2 teaspoon baking powder
1 teaspoon salt
1 teaspoon cinnamon


Preheat your oven to 350 degrees. Butter the two loaf pans, dust them with a bit of flour and set aside. In a small bowl combine the walnuts, poppy seeds, lemon zest, and ginger. Set aside.

In a large bowl, beat the butter until fluffy. Add the sugars and beat again until mixture comes together and is no longer crumbly. Add the eggs one at a time mixing well and scraping down the sides of the bowl between each addition. Stir in the vanilla and then the zucchini.

In a separate bowl, combine the whole wheat pastry flour, baking soda, baking powder, salt, and cinnamon. Add these dry ingredients to the wet ingredients in two batches, stirring between each addition.

By hand, fold in the walnut, poppy seed, lemon zest, and crystalized ginger mixture. Save a bit of this to sprinkle on the tops of the zucchini loaves before baking for a bit of texture. Avoid over mixing the batter.

Divide the batter equally between the two loaf pans. Make sure it is level in the pans, by running a spatula over the top of each loaf. Bake for about 40-45 minutes on a middle oven rack. Remove from the oven and cool the zucchini bread in pan for about ten minutes, then turn out onto wire racks to finish cooling.

Tuesday, September 25, 2012

Sesame Banana Bread


I happen to be one of those people that can only eat certain things when they're in disguise.  My list happens to be pretty short, but bananas are in the top three.  The thought of eating a banana straight up kind of skeeves me out and forget about WATCHING someone eat a banana.  It's just TOO much for me to handle.  Maybe it's a texture thing, maybe it's OCD, but unless bananas are IN something, like a smoothie, I just can't get into it. 

Ironically, banana bread happens to be one of my favorite quickbreads. It's as if someone concentrated the delicious flavor of a banana but without the creepy mouthfeel. 

Conventional quickbreads are pretty straightforward.  Flour, sugar, butter or oil and whatever you want to add in.. pumpkin, zucchini, apple, banana etc..
They are great when you want to bring your neighbor, parents or friends a little snacking cake, but when it's just me, I like to switch things up a bit.

You know.. like adding sesame seeds to banana bread.

The flavor combination sounded a little weird at first.  I've only used sesame seeds in savory dishes, but have used tahini (ground sesame seed paste) in sweets and treats with much success so I decided to give it a go.

I wish I could take credit for the deliciousness of this banana bread, but it was all Heidi Swanson.  Her blog, 101 cookbooks, is a constant source of inspiration for cooking with whole foods ingredients.

A combination of whole wheat and white spelt flour makes this bread heartier than using white flour, which most of us are accostomed to eating.  Olive oil takes the place of canola or vegetable oil, and yogurt is added to keep it moist.  The sesame seeds are a welcome addition, giving the bread texture and a healthy dose of calcium. 


Sesame Banana Bread
Slightly adapted from 101 Cookbooks

1 cup white spelt flour
1 cup whole wheat flour

3/4 cup dark brown sugar
3/4 teaspoon baking soda

1/2 teaspoon fine grain sea salt
1/2 c. toasted sesame seeds

1/4 c. black sesame seeds
1/3 cup extra-virgin olive oil
2 large eggs, lightly beaten
1 1/2 cups mashed, VERY ripe bananas (~3 bananas)

1/4 cup plain,whole milk yogurt

1 teaspoon freshly grated lemon zest


Preheat the oven to 350° F, and place a rack in the center. Butter and flour a 9- by 5- inch (23 x 13 cm) loaf pan, or equivalent.
In a large bowl, whisk together the flours, sugar, baking soda, salt and sesame seeds and combine well.
In a separate bowl, mix together the olive oil, eggs, mashed banana, yogurt, and zest. Pour the banana mixture into the flour mixture and fold with a spatula until just combined. Scrape the batter into the prepared pan and bake until golden brown, about 45 minutes. You want to achieve beautiful color on the cake, but at the same time you don't want to bake all the moisture out of it. So the minute you're in that zone, pull it, erring on the side of under-baking versus over.
Transfer the pan to a wire rack to cool in the pan for 10 minutes, then turn the loaf out of the pan to cool completely.
Serves 10

Friday, September 21, 2012

Green Couscous


I'm a big fan of herb(s).

Not the kind you smoke, silly... the kind you eat.  Then again you can eat the stuff when simmered in butter and incorporated into a bake good, but that's not where I'm going here.

Last time I smoked herb there was lawn gnomes, midgets and Begali tigers involved.

Let's just say that I haven't touched the stuff since that day. No explanation needed.

Fresh herbs, on the other hand, are a whole different story.

I like to keep a variety of different herbs on hand, depending on the season.  Fresh basil in the summer can be tossed with pasta or tomatoes or even muddled with some cucumber and gin for a refreshing beverage.  Sage, thyme and rosemary are great to have in the winter and fall. Add a couple sprigs to soups, roasted vegetables, or even baked goods.  Dill, parsely and cilantro are great any time of the year.  Throw a handful of chopped herbs into a green or grain based salad, mix into goat cheese, sprinkle some on scrambled eggs, or make one of my favorite condiments, chimmichuri.

Added bonus: Fresh herbs are sooo good for you!


Dill is a very good source of calcium, fiber, iron and magnesium and has the ability to prevent bacterial overgrowth.
Cilantro is a powerful anti-inflammatory, promotes healthy liver function, boosts immunity, acts as an overall digestive aid and is high in antioxidants.
Parsley is high in vitamin C, folic acid and beta carotene.  It helps boosts immunity and helps to neutralize carcinogens in the body and can inhibit the formation of tumors.

Not too bad for something that's typically used as a garnish.

As much as I love having fresh herbs on hand, I usually only use a handful here and there often times have a difficult time using them up before they are past their prime. 

I was tickled pink when I came across a recipe that would save all of the herbs in my refrigerator that were on their way out if I didn't use them asap. Couscous is tossed with a mixture of fresh dill, cilantro, parsley and extra virgin olive oil.  The addition of some sauteed red onion, toasted pistachios, and baby arugula turn this into a delicious lunch or light dinner.


Green Couscous
Adapted from Plenty by Yotam Ottolenghi
serves 4

1 c. couscous
1 c. vegetable stock
1 small red onion, thinly sliced
1 T. extra virgin olive oil
1/2 t. salt
3/4 t. ground cumin

Herb Paste:
1/2 c. chopped parsley
1 c. chopped cilantro
1/3 c. chopped dill
4 T. extra virgin olive oil

1/2 c. toasted salted pistachios
3 scallions, thinly sliced
2 c. baby arugula

In a small saucepan, bring the stock to a boil.  Add the couscous, cover and remove from the heat.  Let sit for ten minutes, then transfer to a large bowl and fluff couscous with a fork.
Meanwhile, fry the onion in the olive oil on medium heat until golden and completely soft.  Add the salt and cumin and mix well. Leave to cool slightly
To make the herb paste, place all the ingredients in a food processor and blitz until smooth.
Add the herb past to the couscous and mix everything together well with a fork to fluff it up. Now add the cooked onion, the pistachios, scallion and arugula and gently mix. Season with extra salt and/or cumin if needed.
Serve at room temperature.


Tuesday, September 4, 2012

Sardine Sandwich


It only took me 32 years to discover sardines deliciousness.

Only 32 years.

I didn't know what to expect. Are they super fishy? Do you eat the bones? Do they still have a head.. and do you eat the head?  Water packed or oil packed? What do you eat them with? Can you make a meal of them?

Just thinking about eating them gave me a headache.

Then one day I plopped a tin into my cart vowing to give them a try.

That was 3 months ago.

Sardines are high in calcium (they contain twice the amount of calcium as milk), and vitamin B12 which boosts your mood and helps aid concentration.  They are high in protein and are packed with omega 3 fatty acids. These essential fats reduce inflammation, help to lower cholesterol and have been demonstrated to protect against several forms of cancer. 

Sardines are low on the food chain, so they are very low in contaminants, such as mercury, which is the problem with most seafood. Generally speaking, the bigger the fish, the higher on the oceanic food chain, the more mercury.

These suckers had way too many health benefits for me to NOT give them a try.  I scoured the internet for some recipes but fell short.  Most people seemed to enjoy sardines as a snack, served with crackers and a bit of hot sauce. I was looking for something a bit more substantial.  I wanted to make them the showcase of the meal.  Pasta and sardines was a viable option, until I realized that I had nothing more than some bread, greens, one single egg and some condiments in my fridge.

I figured that canned tuna can make one hell of a sandwich in a pinch, so why not pile some sardines on some crusty bread? Add some grainy mustard, baby arugula, red onion and capers for a little bite and a hard boiled egg, because, well everything tastes better with an egg, and you're in business! This ended up being one of the best sandwiches I have had in a long time, and with the first bite, I instantly fell in love with sardines.

Sardine Sandwich
(Serves 1-2)

ciabatta bread
grainy mustard
arugula
sliced red onion
capers
1 hard boiled egg, sliced
1 oil packed tin of sardines, drained, oil reserved
lemon
sea salt and fresh cracked pepper

Toast a couple decent sized pieces of bread. Slather on some mustard. Top with arugula, sliced hard boiled egg, sardines, a little red onion and some capers.  Drizzle with a little reserved oil from the sardines, a squeeze of lemon and salt and pepper to taste.