Pages

Sunday, December 18, 2011

Pan Fried Gyoza

Gyoza.

A.K.A. little pockets of awesomeness.

Gyoza used to be one of my favorite things to order when dining at a Japanese restaurant. Typically they would come six to an order and would set me back at least five bucks and they were soooo TINY. As tasty as they were I felt like I was being ripped off, especially when they were stuffed with the cheapest of all vegetables, cabbage.

They may look intimidating to make, but really they are quite simple and way cheaper than ordering them in a restaurant.


Lets get this party started.
First order of business: The wrapper.  I bought some wonton wrappers at the asian market. I think I payed maybe a buck fifty for a hundred wrappers. Cheap.  I'm not sure if wonton wrappers are traditonally used, but they worked for me, so whatevs.

Second order of business: The filling.  The base of my filling contained tempeh, cabbage, carrots and shiitake mushrooms, with lots of garlic, ginger and scallion. You could easily make an all veggie version, but I like the way that the tempeh adds a bit of texture, making the dumpling a bit more substantial.

Third order of business: The dipping sauce. Tamari, rice vinegar, sugar and some chili sesame oil. That's it. Spicy and sweet!


Gyoza Filling (makes enough for 2-2 1/2 dozen)

1 1/2 T. sunflower oil (or any neutral oil)
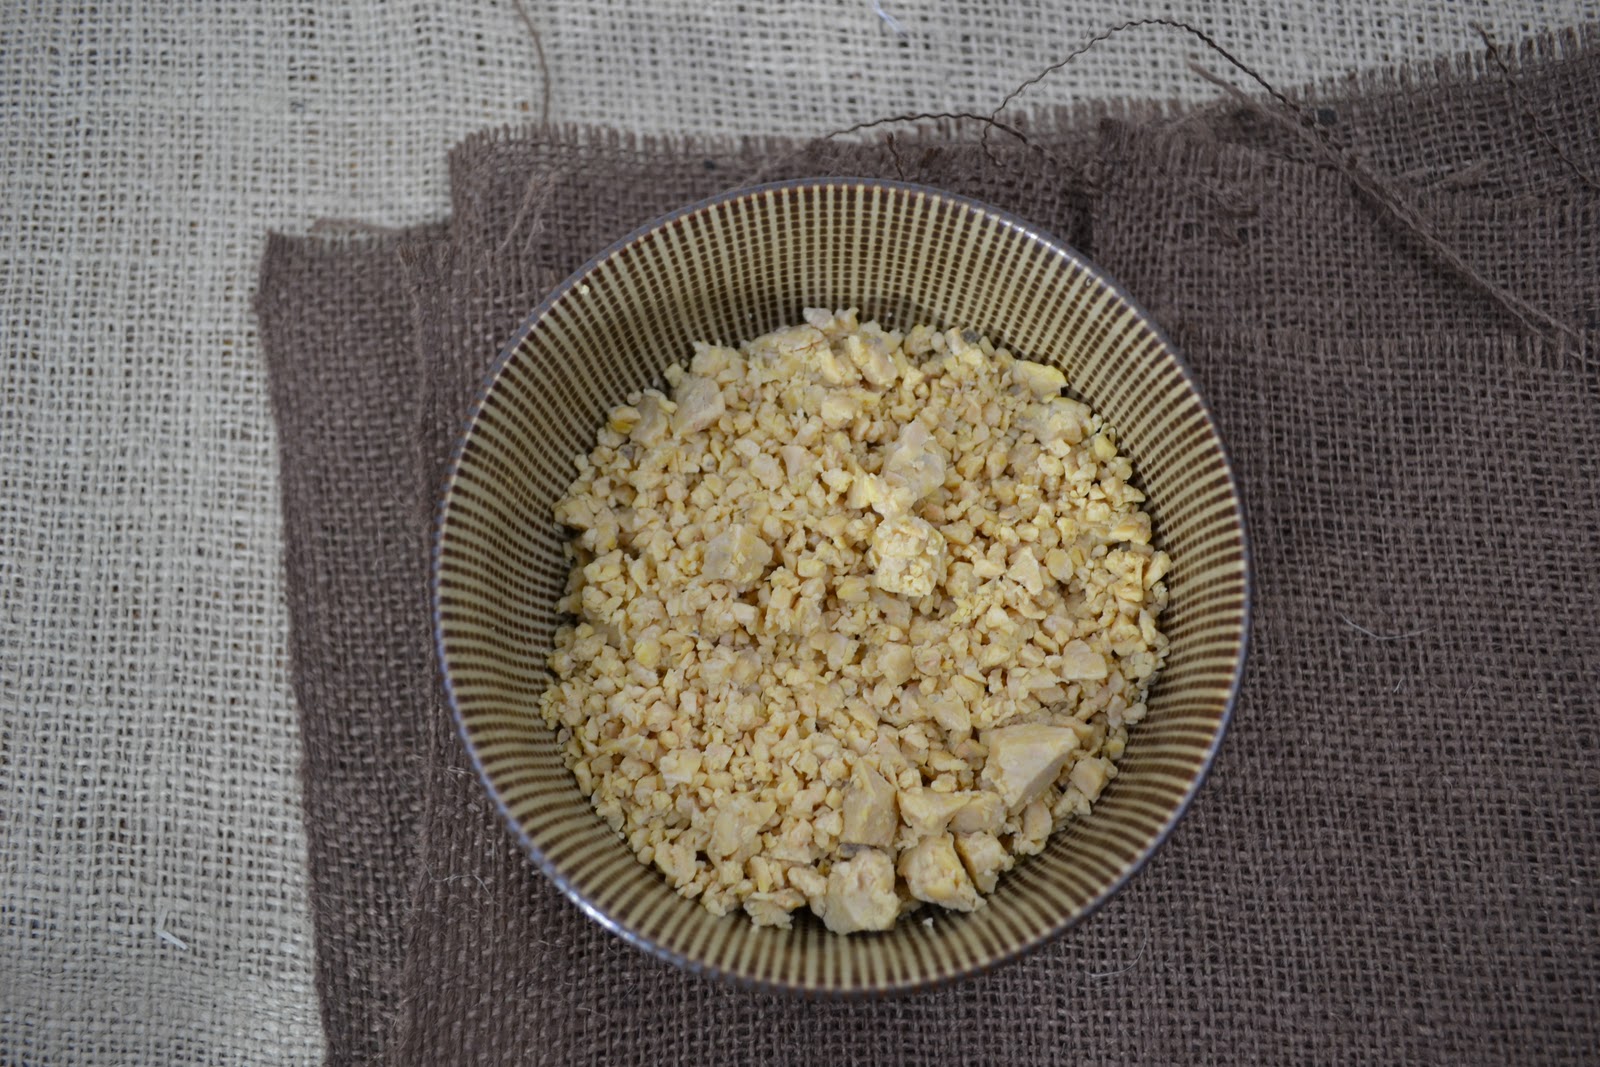
6 oz. tempeh, finely crumbled (I put mine in a food processor and pulsed a couple times to break it up)
2 c. shredded cabbage
1/2 c. grated carrot
1/2 c. shiitake mushrooms, finely chopped
3 scallions, sliced
1 1/2 T. ginger, minced
1 1/2 T. garlic, minced
1 1/2 T. tamari
1 1/2 T. brown rice vinegar
1 t. chili-sesame oil
sea salt, to taste

Heat oil in a large skillet over medium heat. Add the garlic and ginger and cook for one minute. Add the tempeh, mushrooms, tamari and rice vinegar and stir to combine.  Cook for two to three minutes, or until the tempeh starts to take on a little color. If the mixture starts to stick to the bottom of the pan, add a splash of water, and give it a stir.  Add the cabbage, cook for one minute, then add the carrots and cook for an additional 30 seconds.  Stir in the scallion and the chili sesame oil and season with sea salt to taste. Remove from the heat and allow to cool to room temperature before assembling the gyoza.

The mixture should look a little something like this:


While the mixture is cooling you can make your dipping sauce.

Dipping Sauce

3 T. organic sugar
4 T. brown rice vinegar
3T. tamari
1/2 t. chili-sesame oil
1/2 t. grated ginger

Place brown rice vinegar and sugar in a small saucepan over low heat, whisking until the sugar is dissolved. Remove from the heat and whisk in tamari, chili-sesame oil and ginger. Transfer to a bowl and set aside.

When the mixture is cool enough to handle you can start to assemble your gyoza.

In a small bowl mix together 1/2 T. cornstarch and 1/4 c. water. This will act as the glue to hold the gyoza together.

Grab a clean cutting board and lay out six wonton wrappers at a time. Place 3/4 T. filling in the center of each wrapper. Dip a pastry brush (or your finger) into the cornstarch/ water mixture and brush all four sides of the wonton wrapper, just enough to lightly moisten.  Grab one end of the wrapper and fold over like you were sealing an envelope, making sure there is a tight seal. Working along the edge crimp together until you have a little purse.  They don't have to be perfect. You could probably just fold them over and leave them as is and they will still be delicious. Transfer your gyozas to a sheetpan and cover with a damp paper towel to prevent them from drying out. Repeat with the remaining filling.


Now.....

Heat 1 1/2 T. neutral oil (sunflower, peanut, canola etc..) in a large non stick pan over medium heat.  When the oil is hot (but not smoking), carefully lay your gyoza in the pan in a single layer (I think I was able to fit a dozen in my 12" skillet). Fry for about three minutes until the bottoms of the gyoza are a golden brown.  Pour in 1/3 c. water into the pan (try not to pour directly on the gyoza), cover and cook until all the water is evaporated, about 2-3 minutes. Transfer to a serving platter and repeat with the remainder of the gyoza.


Serve hot with dipping sauce.  Eat and Repeat.

Saturday, December 10, 2011

Kale Chips


I am one of those people that (on most occasions) would rather dig into a bowl of kale than eat, fresh baked cookies or ice cream or chocolate. For some reason I get fierce cravings for the stuff and can pack away an entire bunch in one sitting.

Why? Because I'm hardcore.

Yeah, I realize I'm pretty much in the minority here. 

Getting people to LIKE kale, let alone choose kale over a bag of kettle krinkle cut salt and pepper potato chips (which I'm currently obsessed with, by the way) is not easy.

Enter kale chips.

Ok, so they don't taste like potato chips, I'm not trying to kid anyone here. But, they are salty and crunchy and addictive. I've been known to inhale an entire batch in ten minutes, flat.

The best part. Zero guilt.

Olive oil, salt and lemon and a buttload of chlorophyll.


These couldn't be easier to make. I used my food dehydrator, but I'm sure you could make them in the oven.  Just follow the directions below and bake 'em.  I'm guessing maybe 300 degrees for 15-20 minutes.  Then again, I've never made them this way so keep your eye on them. Some blackened foods are delicious, but kale isn't one of them!


Remove the stem and cut into small pieces (about 2-3" in size).


Break out some lemon juice, extra virgin olive oil and sea salt.


Place kale in a large bowl. Drizzle some olive oil on the kale (enough to moisten) along with a squeeze of fresh lemon juice and a pinch of salt. Massage the kale with your hands until nice and soft (about a minute or so). Taste and add more lemon and salt if desired. 


Spread kale in a single layer onto mesh dehydrator trays (I used three trays for one large bunch of kale). Dehydrate for one hour at 145 degrees.  Turn the heat down to 115 degrees and continue to dehydrate until kale is nice and crispy (about 4-5 hours).


Tuesday, December 6, 2011

Little Quinoa Patties


Quinoa in patty form.

Genius.

I've made patties with lots of different grains: millet, oats, bulgar and couscous, but never thought of using quinoa.

I stumbled upon a recipe for quinoa patties in Supernatural Everyday and had to make them at once!


Little quinoa patties (makes 12) supernatural everyday

2 1/2 c. cooked quinoa at room temperature
4 large eggs, beaten
1/2 t. salt
1/3 c. chives
1 onion, finely chopped
1/2 c. fresh parmesan
3 cloves garlic, finely chopped
1 c. whole grain bread crumbs
water if needed
1 T. extra virgin olive oil or butter

Combine quinoa, eggs and salt in a medium sized bowl. Stir in chives, onion, cheese and garlic. Add breadcrumbs and let sit for a few minutes to absorb some of the moisture. (err on the very moist side.. add more breadcrumbs if too wet, more egg or water to moisten).
Heat oil in large heavy skillet over medium low heat. Add 6 patties, cover and cook 7-10 minues, until bottoms are deeply browned. Carefully flip and cook for another 7 minutes, until golden. Remove and cool on a wire rack. Quinoa mixture keeps well in the fridge for a few days.

First time around I served 'em with some fresh pea shoots from the farmers market and some feta cheese with a little champagne vinaigrette drizzled on top.  Perfection.  Filling but not too heavy.


The next day I served them along a huge salad with spicy mesclun mix and mustard roasted potatoes.  The potatoes were like crack, thanks Deb from Smitten Kitchen!


Mustard Roasted Potatoes (from Smitten Kitchen) 

Makes 10 servings
Nonstick vegetable oil spray
1/2 cup whole grain Dijon mustard
2 tablespoons extra-virgin olive oil
2 tablespoons (1/4 stick or 1/2 ounce) butter, melted
2 tablespoons fresh lemon juice
3 garlic cloves, minced
1 tablespoon dried oregano
1 teaspoon finely grated lemon peel
1 teaspoon coarse kosher salt
3 pounds 1- to 1 1/2-inch-diameter mixed unpeeled red-skinned and white-skinned potatoes, cut into 3/4-inch-wide wedges


Position 1 rack in top third of oven and 1 rack in bottom third of oven and preheat to 425°F. Spray 2 large rimmed baking sheets with nonstick spray. Whisk mustard, olive oil, butter, lemon juice, garlic, oregano, lemon peel, and salt in large bowl to blend. Add potatoes; sprinkle generously with freshly ground black pepper and toss to coat. Divide potatoes between prepared baking sheets, leaving any excess mustard mixture behind in bowl. Spread potatoes in single layer. Roast potatoes 20 minutes. Reverse baking sheets and roast until potatoes are crusty outside and tender inside, turning occasionally, about 25 minutes longer.

Transfer potatoes to serving bowl.

Sunday, December 4, 2011

Fresh Cranberry Cream Scones with Candied Ginger


Fresh cranberries.
Crystalized ginger.
Heavy cream.

and...

Butter.

Really, it can't get any better.

Cranberry sauce is great, as is cranberry juice mixed with vodka.

But.. eating a warm scone bursting with fresh cranberries and crystalized ginger with a hot mug of tea... THAT is where it's at.


Fresh Cranberry Cream Scones with candied ginger

Makes 6 scones

Recipe from Joy the Baker (she is amazeballs, check her out!)


2 cups all-purpose flour
1/4 cup raw (turbinado) sugar (you can also use brown sugar or granulated if you have that on hand)
2 teaspoons baking powder
1/4 teaspoon salt
1/2 cup (1 stick) unsalted butter, cold and cut into cubes
1 heaping cup coarsely chopped fresh cranberries
1/2 cup coarsely chopped candied ginger
1 large egg
1 teaspoon pure vanilla extract
1/2 cup heavy cream, cold
cream and sugar for topping

Place a rack in the center of the oven and preheat oven to 375 degrees R.  Line a baking sheet with parchment paper and set aside.

In a large bowl, whisk together  flour, sugar, baking powder, and salt.  Add the cold butter and quickly work the butter into the flour mixture.  Break up the butter until well incorporated into the flour.  Some butter bits will be the size of peas, others will be as small as oat flakes. Toss in the cranberries and ginger and set aside.

In a small bowl, whisk together egg, vanilla extract, and heavy cream.  Add the cream mixture all at once to the flour mixture.  Stir quickly to ensure that all of the flour mixture is moistened by the cream mixture.  Dump the shaggy dough mixture out onto a lightly floured work surface and work together, kneading lightly, into a 1 1/2-inch thick disk.

Cut the disk into 6 wedges.
Place 2-inches apart on baking sheet and brush with cream and sprinkle generously with sugar.
Bake for 15 minutes until just cooked through.  Remove from the oven and allow to cool slightly before serving.  Serve warm or at room temperature.  Scones are best served the day they are made, but these scones will last well wrapped at room temperature for up to 3 days.

Wednesday, November 23, 2011

Cracked Pepper Fettuccine with Roasted Cauliflower and Lemon- Caper Parsley Sauce


There is nothing like a bowl of fresh pasta.

A bowl of cracked pepper fettuccine tossed with crispy, oven roasted cauliflower, a chunky parsley, lemon and caper gremolata, some crushed red pepper flakes and plenty of fresh grated pecorino.

It was heaven I tell you.. HEAVEN.

I picked some up at the farmers market from Flour City Pasta. They had so many flavors to choose from, like pumpkin, wasabi, wild mushroom, and thai chili just to name a few. I had my heart set on the wild mushroom, but since my husband is a funghi hater I settled on the cracked pepper fettuccine.  At $8 a pound the stuff wasn't cheap, but was so well worth it. 


Cracked Pepper Fettuccine with Roasted Cauliflower (serves 2)
Recipe adapted from Flour City Pasta

1/2 lb. cracked pepper fettucine
4 T. extra virgin olive oil, plus more for drizzling
1 small cauliflower, sliced 1/4" thick
3/4 c. flat leaf parsley
2 small cloves garlic, chopped
1 T. lemon zest
1 1/2 T. capers, drained and rinsed
1/4 t. crushed red pepper flakes, or more to taste
grated pecorino romano
sea salt and black pepper, to taste

Preheat oven to 475 degrees.
Bring a pot of salted water to a boil. Cook pasta, drain and set aside.
Toss cauliflower with 2 T. olive oil, spread on a sheet pan and season with salt and pepper. Bake until the cauliflower is lightly browned, about 15-20 minutes.
In a food processor combine the parsley, lemon zest, capers, garlic and 2 T olive oil.
Toss the cooked pasta with the cauliflower, parsley sauce, crushed red pepper flakes, cheese and a pinch of salt and pepper.
To serve, top with extra grated cheese and a drizzle of olive oil.


Friday, November 11, 2011

Butternut Squash Risotto with Fried Sage


Yes. ANOTHER dish involving butternut squash, butter and cheese.

I've gone almost five days without any greens. It's sad, I know.

I'll probably go on a kale binge soon enough, but for now, all I'm craving is squash.

Risotto is one of those perfect dishes to enjoy on a nippy evening.  Comfort food to the max.

Best of all, you only dirty one pot.

You can throw in whatever vegetables you have on hand, based on the season.  I've used corn in the summer, asparagus and lemongrass in the spring and wild mushrooms whenever I can get my hands on them.  Traditionally risotto is made with arborio or carnaroli rice (arborio being less expensive and more readily available), a good stock/broth, a bit of wine and some high quality cheese.  Once you've got all of those in your possesion, you are good to go.


Butternut Squash Risotto with Fried Sage (serves 4 as a main dish or 6 as a side)

1 1/2 lbs butternut squash, peeled and cut into 1/2" cubes
1 medium onion, diced
2 c. arborio rice
6 c. vegetable broth
1/2 c. dry white wine (I used sauvingon blanc)
4 T. butter, divided
1 T. fresh thyme, chopped, or 1 t. dried
1 c. grated pecorino romano
1 1/2 t. salt
1/2 t. black pepper
10 sage leaves
1 T. olive oil

Preheat oven to 425 degrees.
Place peeled and cut squash in a large bowl, drizzle with a bit of extra virgin olive oil, a heavy pinch of salt and a couple grinds of black pepper. Place on a sheetpan and bake for 20 minutes, or until the squash is fork tender. Set aside.

Meanwhile, place your broth in a stockpot over medium heat. You want your broth to be warm when you add it to the rice.  The wine should be room temperature as well, so before you stash that bottle in the fridge, set a little aside first.

Heat 2 T. of the butter in a stockpot over medium heat.  Add the onion and a pinch of salt and sautee for 3-4 minutes, until it softens and becomes translucent. Stir in your rice, and cook for a minute or two, stirring constantly.  This step toasts the rice giving the final dish a pleasant nutty flavor. Add the wine and stir until all of the liquid evaporates. Begin adding your broth one ladle at a time, ocasionally stirring until most of the water evaporates.  Continue doing this until the rice becomes tender. When the reaches a desired consistency, add a bit more broth, remove from the heat and stir in the butternut squash, 3/4 c. pecorino, the remaining 2 T. butter, thyme, salt and pepper.

In a small saucepan, heat 1 T. olive oil. Add sage leaves and fry until they begin to crisp up. Drain on paper towels, then crumble the leaves into the risotto.

Serve with the remaining grated cheese and some fresh cracked pepper.
Don't forget to break out that bottle of white that you opened earlier..


Thursday, November 10, 2011

Butternut Squash Ravioli


Butternut squash ravioli with sage brown butter.

If I were all fancy pants and the like, I would be making fresh raviolis from SCRATCH.

But.. I'm not.

I'm all about making my own kraut, bread, and kale chips, among other things, but for some reason homemade pasta scares me. It looks like an awful lot of work with little room for error, so when I'm craving ravioli without all the nonsense I have a little trick...

Wonton wrappers!!

You can get them at the Asian market mad cheap, which allows you to pump out massive quantities of ravioli with little effort.

Traditionally, ravioli is stuffed with ricotta cheese. I love me some ricotta, but never have the stuff on hand, so I decided to use grated pecorino romano.

Butternut squash + sauteed onions + cheese + nutmeg = A whole lot of yums.

Add in some sage and butter. Do it. It will not dissapoint.


Butternut Squash Ravioli (makes 18 raviolis)

Filling:
1 1/4 lbs. butternut squash
1/2 red onion, diced
3/4 t. fresh grated nutmeg
6 T. grated pecorino romano
1/4 t. sea salt
1/4 t. black pepper

18 wonton wrappers
1 t. arrowroot
2 T. sunflower oil


sage brown butter:

3 T. unsalted butter
10 sage leaves

Preheat oven to 400 degrees. Cut squash in half and scoop out the seeds. Drizzle a bit of oil on top and sprinkle with salt and pepper. Place squash in a baking dish, cut side down. Pour 1/2 c. water in the pan. Place in the oven and bake for 25 minutes or until fork tender. Set aside to cool.  When cool enough to handle, scoop out the squash and place in a bowl.

Meanwhile, place a drizzle of olive oil in a small skillet over medium heat.  Add the onion and sautee until softened (about 5 minutes). Add the onion to the squash, along with the nutmeg, grated pecorino, and a pinch of salt and pepper.

Place 6 wonton wrappers on a cutting board. Place the arrowroot in a small bowl and add 1/4 c. water. Dip your fingers in the mixture and trace the exterior of each wrapper with your finger (this will act as a "glue" so the raviolis won't fall apart).  Place 1 T. filling in the center of each wonton wrapper, then fold over to make a half moon shape, running your fingers along the edges to create a tight seal.

Repeat with the remaining wrappers.

Place 2 T. sunflower oil in a large skillet over medium heat.  Add the ravioli and cook until lightly browned on the bottom (about 3-4 minutes). Pour 1/3 c. water into the pan. Cover and cook until all of the water has evaporated, then continue to cook for an additional 1-2 minutes to crisp the ravioli back up.

Sage brown butter:

Heat butter in a small saucepan over medium heat. When the butter develops a layer of foam on the top, add the sage and continue to cook for an additional 2-3 minutes until the butter turns a light shade of brown.  Be careful.. the butter can go from browned to burned in seconds if you don't keep a close eye on it.

To serve:

Place desired amount of ravioli on a plate and drizzle with the sage brown butter.  A little grated pecorino on top never hurt anyone.